How to fix image upload issues in WordPress
Do you want to fix the image upload issues in WordPress? Here in this article, we will provide a solution to fix the image upload issue in a WordPress website.
Image upload issue is one of the common image issues in a WordPress website. If you are an expert in WordPress this issue is very familiar to you and you can easily solve it. But for beginners, it may become frustrating to solve this issue. But with proper steps, you can easily solve this problem.
Why do image upload issues occur?
The main reason for the image upload issue is the wrong file permission. All the media files you insert into your website are stored in your hosting server. When a user requests a media file your website asks for the file to your web server and the web hosting server provides the file.
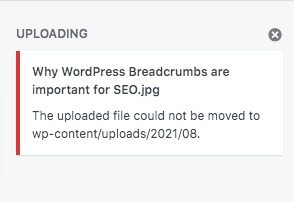
To access the file from your hosting server WordPress needs specific file permission. If your file has incorrect permission, then WordPress won’t be able to access those files. When WordPress doesn’t have access to your server to read files then you won’t be able to upload images on it. When you try to upload the image you will see the following error. “The uploaded file could not be moved to wp-content/uploads”
You can also see this error message – “Unable to create directory wp-content/uploads/2019/04. Is its parent directory writable by the server?”
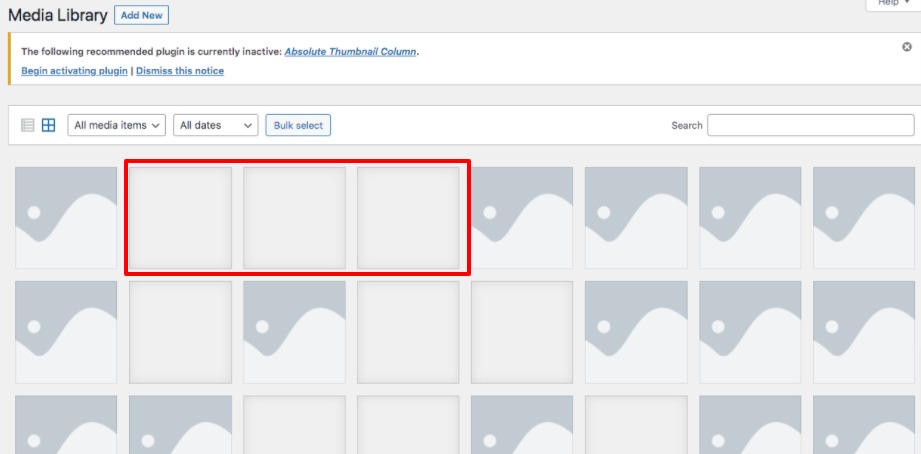
There is also a sign to identify this error. Your media library image will disappear when this error happens.
Why did the file permission change?
Most of the users wonder what changes the file permission of their file? File permission changes for many reasons. If there is any misconfiguration happens then it will automatically change the file permission. You have done nothing in file permission but the wrong configuration will change it automatically.
It happens most of the time when your hosting service provider runs an upgrade. So you can apply the right file permission to fix the issue.
Fix image upload issues in WordPress
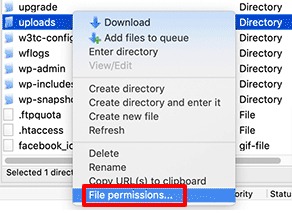
To fix the file permission you need to connect your website with an FTP client. After connecting your website with an FTP client go to wp-content > uploads folder. In the uploads folder, WordPress stores all the media files you insert into your website. Right-click on the upload folder and click on the File Permission option.
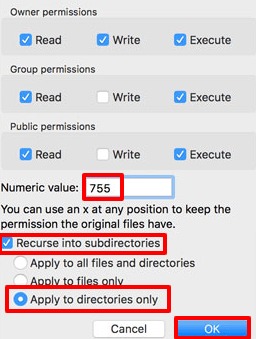
It will show you the permission box. Based on your FTP clients the interface may look different. Here you can find a field named Numeric Value. Here in this field set the value 755.
After that check the Recurse into subdirectories and apply to directories only. When everything is done click on the ok button to save the changes.
This will enable the file permission for this folder and all the subfolders. You need to also check other file permissions on your website and ensure all the file permissions are right.
Now again follow the same process and add 644 to the Numeric Value field. Besides, check the Recurse into subdirectories and Apply to files only option.
Click on the ok button and check your website the error should be solved. If the problem is not solved then you need to contact your hosting provider they will provide a solution for your problem.
Wrapping Up
Following the process, you will be able to fix the image upload issue in WordPress. You can see our other articles to learn How To fix the “Failed To Load Resource” Error In WordPress
Fix the Error Establishing a Database Connection in WordPress
What to do when you are locked out of WordPress admin
We hope this article will help you. If you like this article please like our Facebook page to stay connected.
