How to apply CSS using browser developer tool
Do you want to apply CSS using browser developer tool features? Every modern browser offers you access to the developer tools features to make your workflow better. While developing a product or software, developers need to use different types of tools for different reasons. Some tools help them to add new features on the other hand there are some tools that help the developers to find the bugs. One of the most popular tools almost every developer uses is the browser developer tool. With the help of these tools, developers can easily identify any problems and fix them instantly.
All the modern web browsers have the developer tools features and they offer different features and functionalities on it. Google Chrome is one of the most popular web browsers and almost 65 t0 70% of developers use this browser. So here in this article, we will guide you on how to properly use the Google Chrome developer tools features to apply CSS.
Open Google Chrome developer tool
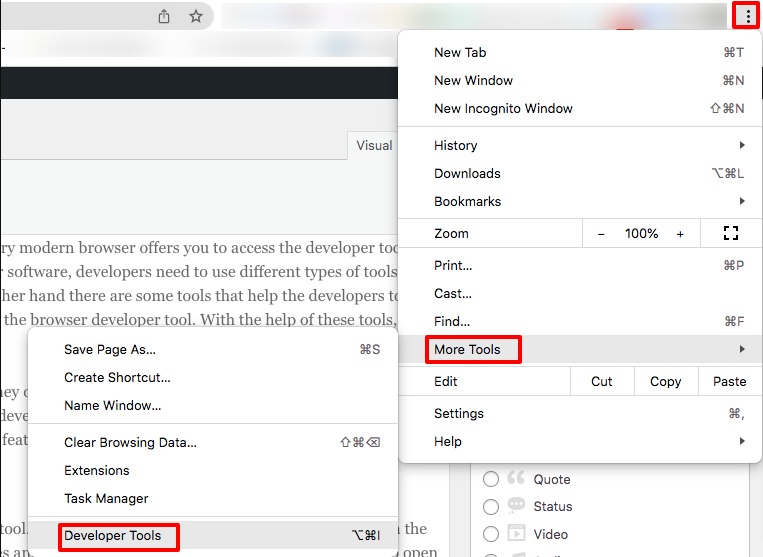
There are three different ways to open the Google Chrome developer tool. You can use the F2 button of your keyboard to open the developer tools. Another way to right-click anywhere on the web pages and then click on the Inspect option. The third way to open the developer tool feature is to click on the three dots at the top right corner and then More Tools > Developer Tools.
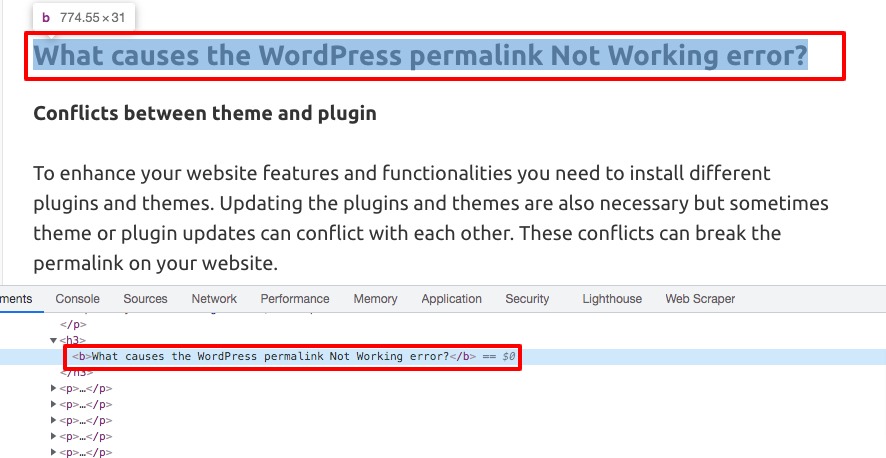
Following these three ways, you can open the developer tool features. The developer tools should look like these but the elements will be different based on your web pages. If you are using another browser then the basic features will be the same. You will see different tabs there; the Element tab will represent the HTML structure of your web pages.
The developer tool will show all the information based on the tab you are opening. You can open the developer tool features for multiple tabs, every tab will show different elements based on the page open on the tab.
Find the HTML element
On the developer tool, you can open every element by clicking on a different section. When you hover on any element on the developer tool it will highlight on the frontend. So you can easily see the preview of it.
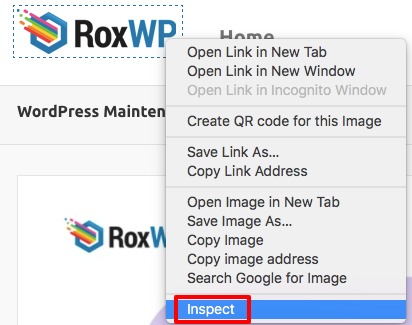
You can see the HTML parent elements and by expanding an element you can see other elements on it. Expanding every element you can see the full HTML structure of your web pages. It will be easier for you to find any specific element even if it is nested into different sections. There is also another easy way to find a specific section. You just need to place your mouse on the section you want to analyze and then right-click and select the Inspect option. Suppose you want to analyze the logo of your website. For this, you need to place the cursor on your website logo and right-click then select the inspect option. It will open the developer tools features for your logo section.
Now you can see the developer tools option for your website logo section.
Apply CSS using the browser developer tool
The right panel of the developer tool displays the CSS of the selected section. You can see all the CSS applied to the selected section on the left panel. You can add your own CSS code on the right panel and see the changes on the front end.
You can also add a CSS script here to see the changes.
Apply CSS script of developer tool
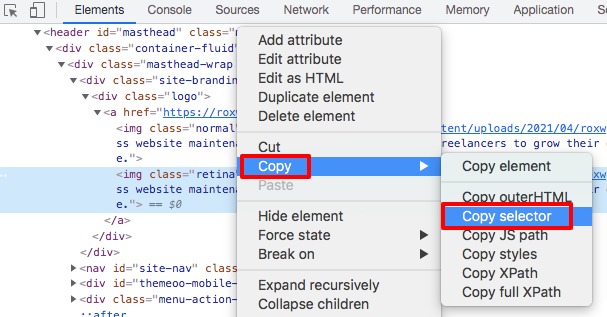
The CSS code you apply to your developer tools will be gone after reloading the page. So you need to copy the CSS code and paste it into your website CSS file. For this you need to click on the HTML element of the section you edit and then right-click and select the Copy > CSS Selector option. This will copy the CSS code of that section.
If the CSS selector is not working properly you can refine the CSS code. After that, you need to make sure that your refined code can work perfectly.
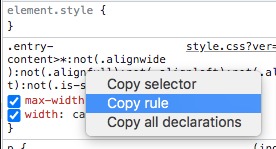
After that, you need to copy the CSS rule. Right-click on the CSS code from the right panel and then select the copy rule.
Add CSS to your website
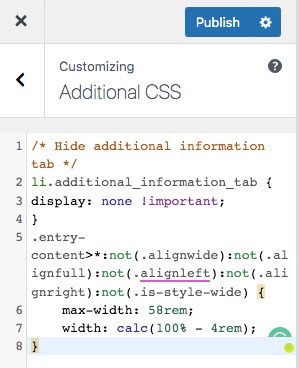
The final step in this process is to add the CSS code you create using the browser developer tool to your website. There are different ways you can add those codes to your website. The easiest way to add the CSS code to your website is to use the theme customizer option. To access the theme customizer option go to the Appearance > Customize page. Here you will find the Additional CSS option where you can add your CSS code. You can also see the live preview of your action too.
When you are satisfied click on the Publish button to save the changes.
If you are using a child theme then you can add the CSS code to your child theme style.css file. If you are not using a child theme then you can see this tutorial to learn how to install a child theme on your website.
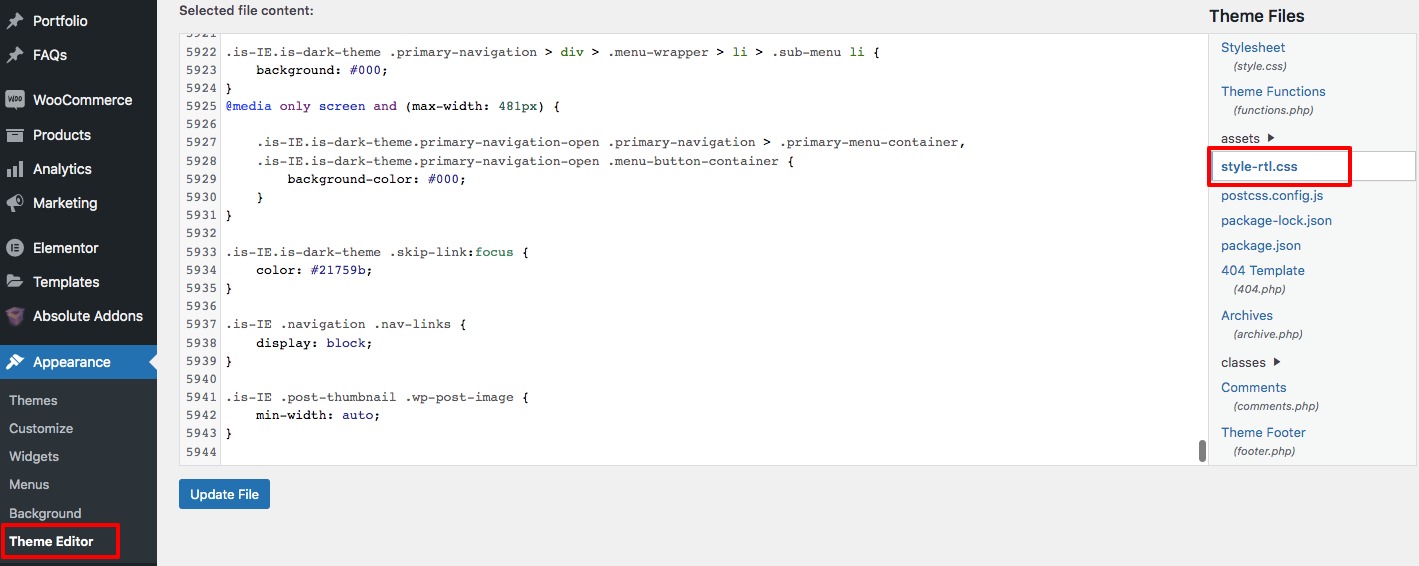
You just need to open the style.css file to your child theme and then paste the CSS rule you copied from the developer tool. You can access the style.css file of your child theme from the Appearance > Them Editor option.
This will add the CSS code on your website child theme.
Wrapping Up
Following the process, you will be able to apply CSS using the browser developer tool. You can see our other articles to learn How to fix WordPress permalink not working error
Fix the WordPress Dashboard Not Loading Issue
How to fix WooCommerce checkout not working error
We hope this article will help you. If you like this article please like our Facebook page to stay connected.

