

How to display full size images on WordPress
![]() 2 Mins Read
2 Mins Read
Looking for a way to display full-size images on WordPress?
An earlier version of WordPress enables users to upload large-scale images on their website. But large-scale images are taking much storage on your server and making your website slow which leads you to poor performance. So WordPress fixes this issue by resizing the images.
WordPress almost reduces the image dimension by half to make it perfect for your website performance. So when the users visit your websites they will see the resized images which take less time to load and make a better user experience.
Why do you need to display full-size images?
WordPress resizing image features is very essential and helpful for most websites but sometimes there are some websites where the owners need to display full-size images with accurate dimensions.,
Photography or studio websites need to display large-size images to attract the audience. Similarly, a stock photo website also needs to display full-size images.
There are also so many reasons a user needs to upload large-size images. So, let’s see how to do it.
Method 1: Full-size image URL
A full-size image URL enables you to add full-size images to your website. This method is perfect for you if you need to display fewer amount of images in full size.
We already know after uploading an image WordPress will automatically scale the image. But WordPress also stores the main images. WordPress will scale your image and create a new one. The main image is stored intact.
When you want to display the full image you need to delete the scale image URL and add the main image modified URL.
To do this go to your WordPress media library from Media > Library and select your image.

Now from the file URL field locate the image URL and delete the “-scaled” at the end of the image URL.

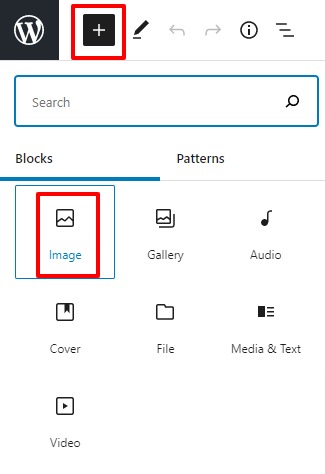
Now copy the image URL and insert it into your website. now you need to insert the image using the link. For this go to the page or post where you want to add the image and then add the image block by clicking on the “+” icon.
Your image block will be added and now click on the insert from URL option and paste the image URL.

Don’t forget to publish or update the page.
Method 2: Disable image scaling feature on WordPress
From method 1 you need to edit every single image you have to display in full size. So if your website is fully based on full-size images then the first method is not perfect for you. You can use a plugin to disable the auto image scaling features of WordPress.
Here we are using the Disable “BIG Image” Threshold WordPress plugin to disable the scaling features. Install and activate the plugin and you don’t need to do anything. The plugin will automatically remove the big image threshold of your website.
This plugin disables the default WordPress image scaling features and when you upload an image it will have the same dimension on your website.
Wrapping up
We hope this article will help you to add full-size images to your website. You can also see our other tutorial to learn
How to create custom post types in WordPress
How to change the author of a post in WordPress
If you like this article please like our Facebook page to stay connected.