User Agent
Whitelist UptimeMonster IPs and User Agent in Cloudflare
If you’re using a Cloudflare firewall with your system, it’s best practice to whitelist UptimeMonster’s IPs and User Agent. This will ensure that Cloudflare doesn’t block UptimeMonster’s monitoring requests, helping to prevent any false incident alerts.
What are UptimeMonster IPs
UptimeMonster is currently using these two IPs 162.55.41.109 and 2a01:4f8:c012:9c4a::1
Allow UptimeMonster IP in Cloudflare
Step 1
Log into your Cloudflare account, navigate to the left menu and select the Security tab. From there, click on WAF (Web Application Firewall)

Step 2
This will open the Web Application Firewall (WAF) security options. Next, go to the Firewall Rules tab.
Click on Create Firewall Rule to set up a new rule. Now name your new Firewall rule.
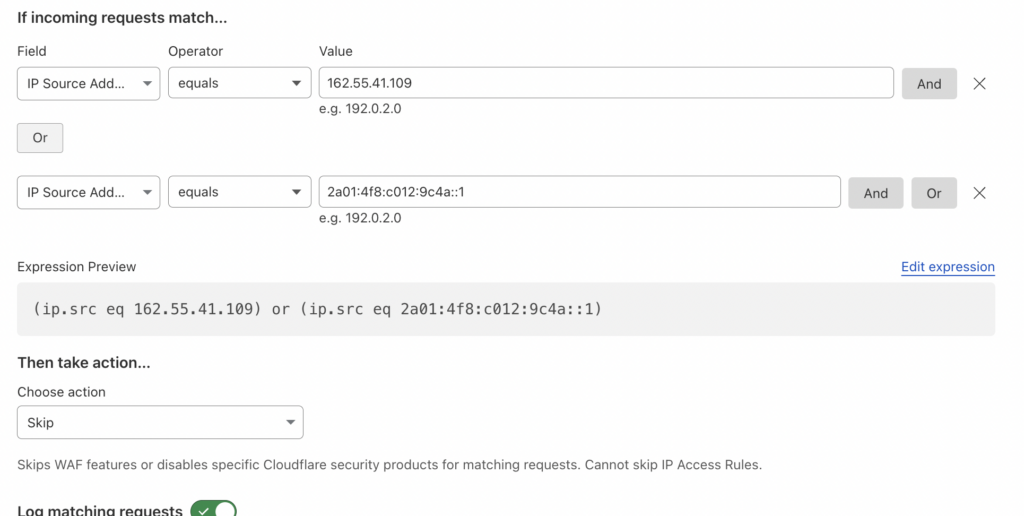
Configure the following fields for your new rule:
- Field: Set to Ip Source Address
- Operator: Choose Equals.
- Value: 162.55.41.109
Now click on the Or button to add the second IP
- Field: Set to Ip Source Address
- Operator: Choose Equals.
- Value: 2a01:4f8:c012:9c4a::1

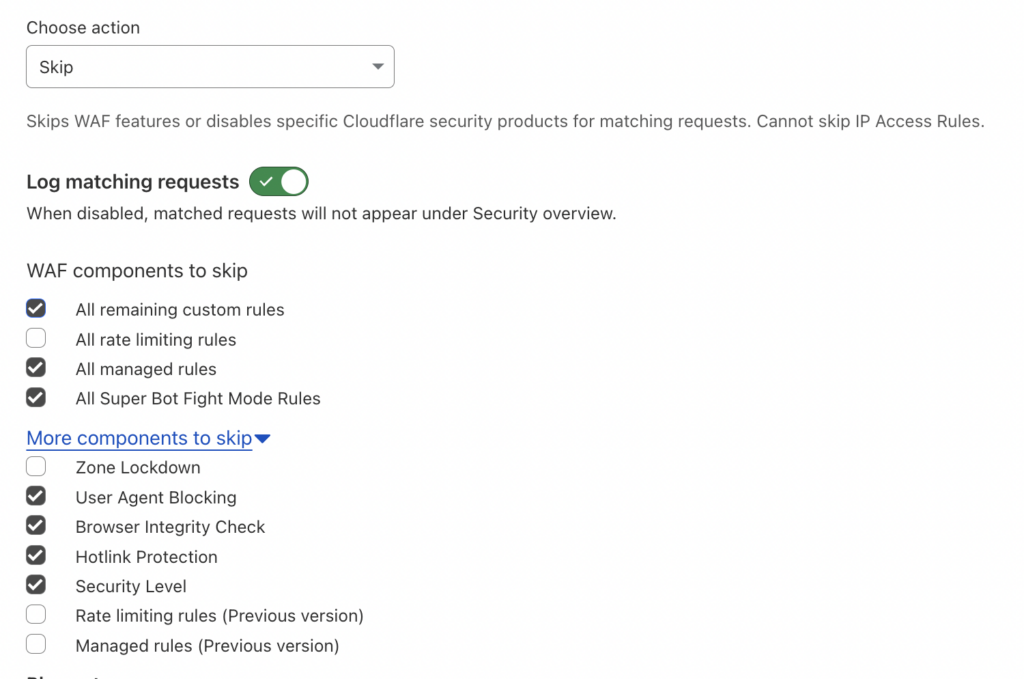
From the Choose Action dropdown, select Skip and check the following option :
- All remaining custom rules
- All managed rules
- All Super Bot Fight Mode Rules
From the More component to skip option select the following one
- User Agent Blocking
- Browser Integrity Check
- Hotlink Protection
- Security Level

After completing, click on Deploy in the bottom-right corner to activate your new firewall rule.
Allow UptimeMonster User Agent Cloudflare
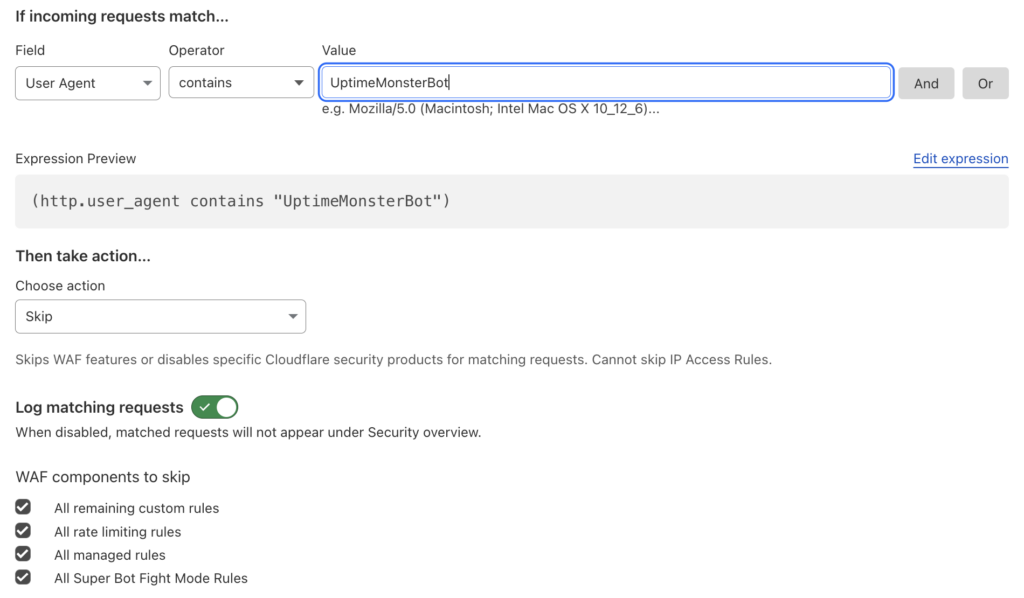
- Field: Set to User Agent.
- Operator: Choose Contains.
- Value: UptimeMonsterBot

Then from the Action option select Skip. and select the following option:
- All remaining custom rules
- All managed rules
- All Super Bot Fight Mode Rules
From the More component to skip option select the following one
- User Agent Blocking
- Browser Integrity Check
- Hotlink Protection
- Security Level
After completing, click on Deploy in the bottom-right corner to activate your new firewall rule.